Powered by Blog - Widget


Showing posts with label Cook. Show all posts

Friday, July 04, 2014

Cook: Lemon Chicken

It's been a while since I posted a recipe on this blog!

While I was thinking about where I wanted to go with this blog, a couple of nice things happened. Specifically, a couple of nice people came up to me separately and told me that they had tried my recipes and liked them. I was very very encouraged. Thank you for trying my recipes! I've since decided to dedicate a bit more time and blog space to sharing more of my favourite recipes plus some other foodie joints which I like. I'm targeting to have this up every alternate Friday for my own version of Foodie Friday. Do check back in for that!

Today, I thought I would share a recipe for Lemon Chicken. I was cracking my head over what to cook for dinner one afternoon and suddenly thought of trying Lemon Chicken because I thought my kids would like it. I was right. It was a HUGE hit and has now entered our regular dinner rotation. This is the Chinese version Lemon Chicken that tastes great with rice but can also be eaten on its own. This recipe is based on the recipe in Easy Chinese Recipes by Bee Yinn Low. 

Lemonchicken

Lemon Chicken

Ingredients:

1 large boneless chicken breast, skin removed
1 large egg, beaten
Oil, deep frying
Lettuce, for garnish (optional)

For the Marinade: 

1½ tsp soya sauce
½ tsp sesame oil
1 tbsp corn flour
1 tsp Chinese rice wine

For Coating the Chicken:

¼ cup plain flour
¼ cup cornflour
1 tsp baking soda

For the Lemon Sauce:

3 tbsp fresh lemon juice
2 tbsp plum sauce
2 tsp water
½ tsp corn flour
Salt, to taste

Method:

1. Cut the chicken breast into two equal pieces place in a shallow dish. Mix the marinade ingredients together and pour this over the chicken. Leave to marinade for 30 minutes.

2. Mix together the coating ingredients in another shallow dish and set aside.

3. Add all the ingredients for the lemon sauce into a saucepan. Heat the sauce pan over low heat and stir to mix well. Remove the saucepan from the heat once the sauce starts to bubble and boil.

4. When the chicken is done marinating, remove from the marinade sauce. Dip each piece in the egg then dip into the coating mix and cover the chicken evenly, shaking off the excess.

5. Heat oil in a saucepan, sufficient for deep-frying. When the oil starts to smoke, gently drop the chicken into the oil. Deep fry till golden brown.

6. Remove chicken from oil and place of paper towels to remove excess oil.

7. Cut chicken into bite-size pieces and serve on a bed of lettuce. Drizzle with lemon sauce just before serving.

Cooking Notes:

♥ I usually serve up the chicken with the sauce on the size so everyone can drizzle on as much or as little as they like. 

♥ The sauce is deliciously tangy. If it's too sour for you, you can add up to ½ tsp of sugar to the sauce when simmering in the pan. Or like my Mei, just eat the chicken plain or with a squeeze of lemon juice over it.

Monday, December 30, 2013

Christmas Time Is Here

 I wasn't really ready for Christmas, but it came anyway. And you know what? We had a great time. 

Xmas1My homemade Christmas crackers (a clever idea by my friend Jasmine) and the aftermath!

We didn't have a big Christmas this year. Just a couple of gatherings with people who meant the most -- family, old friends, and not so old friends. We talked, we laughed, we played (or at least the kids did), and we ATE. Aside from ham which I made three times this year, my Christmas feasting was mostly non-traditional: Sushi and Jap-inspired pasta with friends, Teppanyaki with the in-laws, Dim Sum lunch with my family, and Steamboat with the girls. It was awesome, not the least because we didn't have to endure paying cut-throat prices for seasonal food. I was telling the hubby that we should totally do the reverse during Chinese New Year and have Western food but my old man refused. Hah.

Of course, I couldn't pass up the chance to cook one large Christmas meal, which I managed to do, with some contributions from my Mum. She took care of the Angus Roast Beef and made a salad and some soup, while I whipped up some mash, a jap-insipred pasta, tackled the Ham, and tried something new: a Pork Knuckle. Nothing gets me excited like trying a new recipe, especially when trying to reproduce a family favourite!

After getting directions from the butcher and doing a bit of online research, I decide to follow this recipe. I salted the skin of the knuckle the night before generously as directed. "敢敢来!" said the butcher, so I that's what I did. And behold, the next day, the skin was nice and tight and dry. That's when I started getting excited. I seasoned the meat portion in the morning and added some extra seasoning to the skin before I stuck it in the oven. It cooked nicely for about 1 hr 15 min, then I turned the temp up to 220°C and hoped for the best. It was a bit scary cos I've rarely ever turned my oven that high. Didn't help that it started smoking! (It was from the oil dripping down from the meat and hitting the hot pan.) I gingerly hung around and when the skin turned a lovely golden colour, I decided to pull the knuckle out. On hindsight I probably could have left it in for a while more but I didn't want to risk it. But I was very happy with what I pulled out. The skin had a nice ring to it when I tapped it with a spoon and I knew it was going to be crispy. 

Xmas3Port knuckle:  When I first put it in the oven and immediately after pulling it out!

Of course, the ultimate test is the taste test, and the verdict? It was really really yummy. (Yay.) The meat was tender and juicy while the skin had a good crunch to it. I'm definitely going to do this again -- and perfect it! It was a really good meal, if I may some myself.

Xmas2The Christmas Feast

After all that food, we broke from past tradition and did the gift exchange and opening there and then, much to the delight of the children. They were certainly thoroughly spoilt, with gifts from my whole family. My parents and my sis and brother-in-law bought them so many gifts! It was a present bonanza.

Xmas4Barbie! Her first, from her doting grandparents.

Xmas5The orange Hot Wheels Lamborghini that he's been telling me about for a couple of weeks. His grandparents had brought him along to pick his own presents.

Xmas8And the wall track to go with the cars! This has stayed on in my parents' house, to be played with when he's there.

Xmas7Mr Men and Little Miss complete collections! Yay! A present from my sis and brother-in-law, at my request.

Xmas9No Christmas is complete without Lego! This from my brother.

Xmas6Meips favourite present of them all, and really the smallest one she received: a Hello Kitty pouch from my sister. I don't know how I managed to raise a Hello Kitty fan, but the the cat is definitely growing on me!

That was our Christmas, and I think it was a lovely way to end the year. 

Xmas10

Saturday, December 07, 2013

ToTT Presents: Best Brunch Ever

I don't know about you, but there's nothing much that I like better than starting the day with a leisurely breakfast.

Sadly, I don't get the chance to enjoy this much on regular days as my mornings are usually a mad rush. On Mondays to Fridays, I'm busy ferrying Noey to school, DD to work and Meips to classes. Noey's got music class on Saturday morning and Sunday morning is reserved for church. It's usually grab and go for me. So I'm really enjoying the school holidays now, where we've had a bit more time to start the day right. 

As it happened, I had the perfect opportunity to get some fresh ideas for brunch at the launch of ToTT's new cookbook, Best Brunch Ever - Delicious Morning Recipes To Savour. ToTT is one of my go-to places for cookware, bakeware and tableware, and having been to a class there before, I knew I was in for a treat. And ok, getting to go for a cooking event without the kids on a Saturday was definitely a treat in itself!

BestBrunch1

Best Brunch Ever is collaboration between ToTT and 8 well-known chefs in Singapore, featuring 24 yummy looking brunch recipes. These recipes come from a variety of cuisines, 8 in total, ranging from American to Singaporean to Italian and Vietnamese, ensuring that there is something for everyone. Along with each recipe, the chefs also share handy cooking tips and recommended tools for ease of preparation.

On the afternoon of the launch, we had the privilege of watching demonstrations of 4 of the recipes featured in the book, each expertly prepared by the chefs themselves, namely:

  • Spaghetti Piccanti by Chef Antonio Fachinetti of Prego
  • Eggs 'A La Coque' by Chef Nicolas Joanny of Nicolas Le Restaurant
  • Cornbread Wedges and Bacon Jam by Chef Dan Segall of The Big Idea Group
  • Bahn Cuon by Chef Chi Quang Trinh of Addictions Cafe and Remedy Bar

All so different but all so very good. I actually started feeling guilty and yet really thankful to my husband for taking both kids off my hands so that I could enjoy such a yummy brunch.

ToTTBrunch1Spaghetti Piccanti, made with calamari, anchovies, bread crumbs, chilli, garlic and fennel.It was almost too easy and definitely something I can see myself putting together at home.

ToTTBrunch2Some of the nearly perfectly topped-off eggs for the Eggs 'A La Coque'. The chef's assistant made it look so easy! She simply ran a knife around the egg, applied a little pressure, and off came the top! Somehow I'm not so sure that's exactly the outcome I'd get if I tried!

ToTTBrunch3Chef Nicolas Joanny plating our tasting portions, and giving us a glimpse of how it must be to plate many servings of food in a restaurant.

ToTTBrunch4The deceptively simple-looking Eggs 'A La Coque'. This is truly gourmet, I assure you!

ToTTBrunch5Chef Dan Segall demonstrating the use of the Hotmix Pro in the making of the Bacon Jam for his dish. The machine is pretty amazing. It can grind the bacon, chop the onion and garlic and cook it all in the same pot. No mess and no fuss over having to stand at the stove for an hour to reduce the ingredients to the right consistency.

ToTTBrunch6Cornbread Wedges and Bacon Jam. The latter is really out of this world delicious. A bit like Bak Kwa, a friend noted, but with more of a savoury flavour. I have to try to make this.

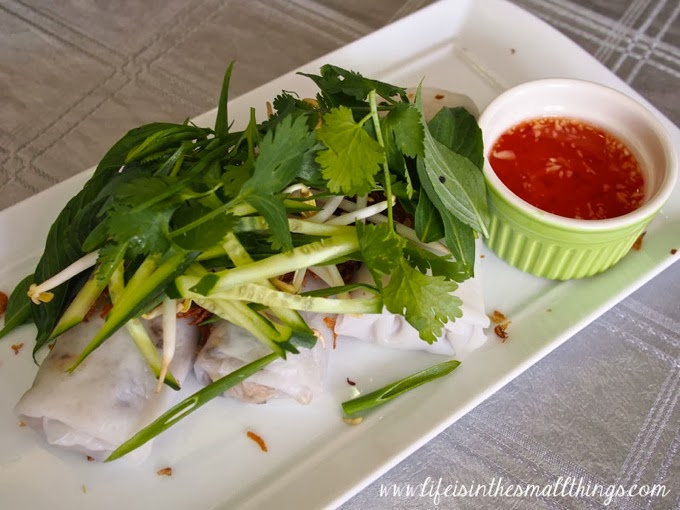
ToTTBrunch7Bahn Cuon - Vietnamese rice rolls with a filling of onions, minced pork and black fungus. Mmmm.

ToTTBrunch8All four of our chefs for the session together.

After trying the food, I think that the $12.90 that the cookbook is retailing at is quite a steal. Grab your copy at ToTT! The husband excitedly flipped through it when I brought a copy home and earmarked some recipes he was interested in, including The Great Singaporean Breakfast by local chef Eric Low. The homemade kaya certainly looks interesting and is on my to-try list. Alongside the bacon jam, of course!

At the same session, we were also introduced to the all-new ToTT online store -- ToTTstore.com -- and given the very welcome news that you can now shop ToTT online! Hurray! With over 1,500 products (about a quarter of their full inventory) available, you can now shop for your cooking, baking and hosting essentials from the comfort of your home. All purchases above $200 enjoy free delivery too!

Three unique features of this new e-commerce site that we were introduced to:

  • One-click login is possible with Facebook Connect, which links straight to your Facebook account. Create an account instantly and start shopping!
  • Wishlist -- Users can easily create a wishlist of items carried by the online store that can be shared with others. Sounds like convenient way to create a gift registry for a wedding or housewarming, or just to let your partner know what to get you for Christmas. *wink*
  • The detailed Product Comparison feature which allows users to view not just the differences but also the similarities between products, to allow users to have a fuller picture of products they are choosing between. 
I don't deny it -- I love online shopping and am thrilled to have another of my favourite stores available online. This is actually a great time to be checking out ToTTstore.com because from now till 25 December, ToTT will be offering discounts of up to 50% on selected products, 1-for-1 on Christmas-themed cooking classes and novel gift ideas at its annual Christmas sale. I know I'll certainly be popping in for some shopping!

Tools of the Trade (ToTT)
896 Dunearn Road, #01-01A
Sime Darby Centre
Singapore 589472
Tel: 6219 7077
Web: www.ToTTstore.com

Tuesday, November 26, 2013

Jamie's America: Not Just About Burgers {Christmas Giveaway #1}

If you take a look at my cookbook collection, you'll realise that Jamie Oliver keeps popping up.

Yes, I'm a fan-girl: guilty as charged. I can't help it. I arrived in the UK for a study stint years ago and was faced with the prospect of having to cook (or buy or beg or steal) to sustain myself. Having ZERO cooking experience under my belt, it was Jamie Oliver The Naked Chef who taught me that cooking could be fun and easy. And oh yes, taste good too. 

So when a friend first brought my attention to the fact that Jamie's America was retailing at a substantial discount at The Groovy Giraffe, I immediately snapped it up. Mainly because I just cannot resist a good deal (more than 60% off!) but also on the basis of my faith in the man's recipes. It certainly wasn't because I was interested in American food. Oh no. Isn't American food just fast food anyway?

JOAmerica5

I was glad to discover that I was wrong -- there IS more to American food than simply a good burger. Yes, the burger is in there and yes, it is the first recipe, but there's plenty of other stuff on offer. When researching this book, Jamie Oliver traveled through the United States to discover what real American food is about and this cookbook with its rich and diverse recipes is the result. The food in this book is categorised into six sections, namely New York, Louisiana, Arizona, LA, Georgia and the "Wild West". I'm sure that list already gives you an idea of the wide variety that you're going to find between the pages! 

And that's exactly what I found. From the traditional classics like Mac 'N' Cheese, Waldorf Salad, Deep Pan Pizza and NYC Cheesecake to the exotic. There's a recipe in there for Cajun Alligator with Sweet Potato Salsa that I'm not sure I'm ever going to be able to re-create! But being someone who used to seeing a lot of Italian and French-inspired fare in cookbooks, I must say that the recipes in this book are quite a breath of fresh air.

The proof of a cookbook however, is in the tasting. How is the food?

I've only managed to cook a handful of recipes so far -- I flagged more than 20 to try! -- and they have all, hand on heart, been delicious. There, I knew my faith in Jamie Oliver would not have been misplaced!

I was most interested in the recipes in the Louisiana section of the book as I was thrilled to discover that most of them were to be eaten with rice. Hurray, especially if you have rice-loving kids like mine. The first dish I decided to make was the Southern Sausage Stew. I chose this because of the minimal prep time required, and indeed it took only about an hour from fridge to table. A big plus in my book! The verdict: "Deeeeeelicious!" said the kids and husband. I had to omit the cayenne pepper and chillies because of the children, but the resulting tomato-y stew was still yummers and definitely went well with the rice. Noey polished off three whole sausages so I was well pleased.

JOAmerica2Southern Sausage Stew

Not being as much of a sausage fan as the rest of the family, my favourite dish so far has been the Chicken, Sausage and Shrimp Jambalaya. Or in my case, the Chicken, Sausage, Shrimp and Clam Jambalaya. The word Jambalaya is thought to have its origins in a French word that means jumbled, and in the original version, any Louisiana critter that was unlucky enough to get caught would go into it. So I guess you can say I was acting in the right spirit to have thrown in the clams, something I did as I was concerned that they'd spoil if they sat in the fridge any longer.

If it looks similar to paella, it's because it is. And boy, does it taste good! I had used our regular Thai rice so the texture was a bit mushy but still tasty. I've already gotten myself some long-grain rice to use on my next attempt to see if it would make any difference. Incidentally, Noey's favourite Carpenters' song is Jambalaya and he was most amused when I told him it was what we were having for dinner.

JOAmerica6Chicken, Sausage and Shrimp (and Clam) Jambalaya

Another dish that went down well with the kids and husband was the simply named Traybaked Chicken. From the Wild West section of the book, this dish is apparently inspired by the al forno that is made in those parts with sliced sweet potatoes, Yukon potatoes, sage and onions. With the addition of chicken and a bit of cream, it becomes a rather rich and tasty one dish meal. You would think that chicken done this way would be a bit dry, but no. Thanks to the fact that the chicken is marinated in brine overnight, it is, instead, incredibly tender.

JOAmerica3Traybaked Chicken 

I've a few more on my list this week, including a chicken noodle soup, lovingly called Jewish Penicillin in the book, so I'll let you know how it pans out. Do check out my Instagram account (@mummybean) to see my food exploits and more!

So I can say, thus far the recipes have all been hits. But don't just take my word for it: you can try them for yourself as I have ONE COPY OF JAMIE'S AMERICA (RRP: $46.88) to give away! To stand a chance of winning this book, you MUST do the following using the Rafflecopter widget below:

1. Be a fan of The Groovy Giraffe Facebook Page

2. Be a fan of the Life is in the Small Things Facebook Page

3. Like this post on Facebook and leave your e-mail address on the Facebook post.

You can also follow the additional optional steps in the Rafflecopter widget to gain more chances. (Do note that this giveaway is only open to Singapore residents.)

a Rafflecopter giveaway

This book will be a great addition to any cookbook collection, so don't hesitate -- join now! Even if you don't cook, I'm sure this will make a good gift for a friend or family member who does this Christmas. And honestly, the book is quite a visual treat, with the recipes beautifully photographed and laid out, and strewn with stories and pictures from Jamie Oliver's travel through the country.

JOAmerica9

JOAmerica7

If you can't wait and want to get a copy of the book right now, you can purchase it at The Groovy Giraffe for just $14.90, more than 60% off it's retail price! What's more, you can use the code "GET5OFF" to get an additional 5% discount. There are also other Cookbooks (including Gordon Ramsey and Nigella Lawson titles) going at great discounts, and a good selection of Children's Books too! You can check out my previous post on The Groovy Giraffe too to find out more and get more recommendations. 

JOAmerica1

Good luck and I'll be back next week with another giveaway so stay tuned!

*This giveaway was kindly sponsored by The Groovy Giraffe, and I am a member of their affiliate programme. All opinions remain my own.

Friday, November 15, 2013

Serving Up Love on a (New) Plate

Dine Well

This dish is one of our family favourites. It's honey roasted chicken and it's super yummy as the chicken cooks in a pan in its own juices with honey, lemon, garlic and oregano. I serve this with chicken rice and the kids just hoover it up. It is one of the easiest dishes to feed them.

However, this post is not about the food, good as it is.

(Incidentally, if you're keen to try this recipe, my friend Pam has shared her version of this dish on A Dollop Of Me as part of the Kitchen Exploits Family Favourites series. You might want to check it out at this link: Winner Winner Chicken Dinner.)

This post is about that plate, which my dinner is sitting pretty on. Plates that my dear husband lugged back from Australia when he had to make a quick business trip over a weekend a couple of weeks ago. My husband knows I love pretty crockery as much as he thinks it is completely pointless. So I was really touched that he bothered to go shop for a dining set and lug it home for me as a gift. I've got to admit that the design is more his taste than mine, but hey, the man carried home a heavy and bulky gift that he actually thinks is rather pointless because he thought I would like it, so love it, I do.

Our marriage, like all marriages, isn't perfect. There are many many days where we take each other for granted or get annoyed with each other (reasonably or otherwise). For me, there are many instances where I ignore my husband's needs in favour of meeting the kids'. It's not something I'm proud of, and lately, I've been thinking up and putting into practice ways in which to shift the balance. Like cooking his favourite food more regularly, or making the time to be together, or simply not begrudging him his need to rest.

I think on the question of whether my husband or my children should come first in my life (after God, that is), the answer is clear: it should be my husband. We chose to be together and it is on the foundation of our marriage that our family has been built. But I can also tell you that it can be very difficult to do so, especially when the kids are young and demand a lot of attention, and practically suck the life out of you. One of the reasons I found the first year after birth difficult was because it is so consuming that my relationship with my husband had to take a backseat. No, make that a very-last-row-on-the-bus seat. Which is bad, because on top of being tired, I was also lonely. Now that the kids are a bit older, it's still too easy to get stuck in the daily grind of their needs, especially when I'm home with them nearly 24/7. But I realise that I must make the time and consciously choose my priorities.

This plate serves as a reminder to me of the need to think about my husband, and on its part, reminds me that my husband is thinking of me too.

Monday, October 07, 2013

Family Favourite: Chicken Cacciatorre

Like every family, we have our family favourites when it comes to the dinner table. I have shared a number of these recipes here on this blog, but this week, I'm sharing a new dish on A Dollop of Me: Chicken Cacciatorre! 

My friend Corsage is running a 10-week long series on Family Favourites for on her blog, featuring 10 different bloggers who would each be sharing a favourite dish. She's right in the middle of it and it's my turn this week! This chicken dish is a hit with the husband and the kids. Pan-fried chicken cooked in rich tomato sauce -- what's there not to love right? The kids hoover this up every time I make it. Dinner is always quick (or at least relatively so - they are kids after all) when this is served. Do click on over to check it out!

IMG 0156

And while you're over at A Dollop of Me, don't forget to check out the rest of Corsage's Kitchen Exploits series, which features lots of easy family-friendly recipes. She's an inspiring mother of two with an eye for beauty and a way with words and I've always found her blog a good read.

As for me, you know where to find me. It's a busy run up to Noey's birthday party this weekend but I hope to be back with more soon.

Thursday, August 29, 2013

Honey Butter Popcorn

Here's a fun little recipe that I've penned only because it was part of my son's homework.

Noey's kindy class is doing a project on food for their class project this term and I think it's been a lot of fun. All their learning has been centred on the theme and I think the Noey is really enjoying it. When his class made a field trip to HealthZone at the Health Promotion Board earlier in the term to learn about the food we eat and what makes a healthy diet, Noey came home spewing information about foods that had a lot of fat, and foods which didn't. That really tickled us for quite a while! He and his classmates have also been cooking up a storm in school every other week or so. In cooking sessions conducted alternately in English and Chinese, they have made dumplings, muffins, spring onion pancake and pizza so far, with two more sessions to go. I volunteered to "teach" the kids how to make muffins and it was really so cute seeing how enthusiastic they all were! 

Another part of this project extends to compiling a class cookbook of their favourite recipes, and after some discussion, Noey and I eventually agreed that we were going to share our own recipe on Honey Butter Popcorn. We've been enjoying popcorn quite a bit around these parts, since we first made our own, and I thought it might be an interesting addition to the collection.

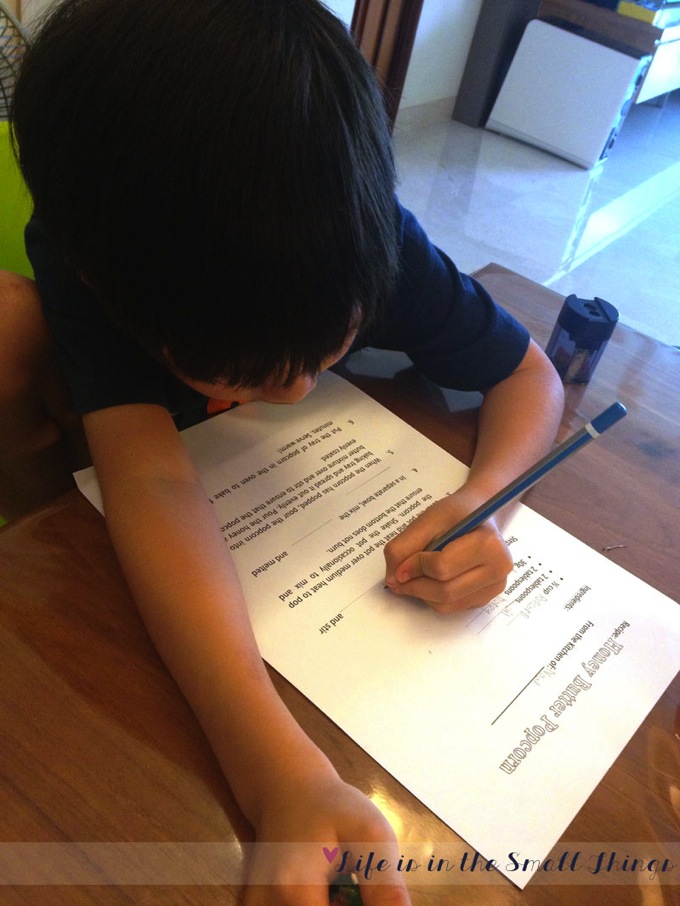
To make sure I wasn't the only one doing all the work, I worked on the recipe with him and we typed out the recipe together, leaving blanks for him to fill in. It wasn't the nicest piece of work, but at least it was mostly his!

Popcorn2

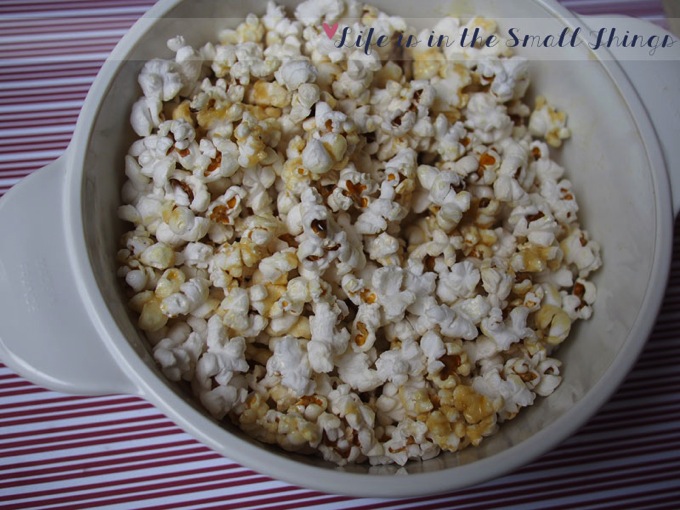
Sine we've already written out this recipe, I thought I'd share it here too, to get more mileage out of it. If you, like me, can't decide between sweet and salty popcorn and would like a bit of both, this might be for you. I like to make a batch for tea time and watch it disappear! This makes a big bowl. Do note that I make this for my kids so the amount of honey and butter isn't a lot, and is intended to coat the popcorn thinly. If you like it sweeter and love to drench your popcorn, feel free to increase the amount of the honey butter mixture.

Popcorn4

Honey Butter Popcorn
(Serves 4-6 as a Snack)

Ingredients:

½ cup Popcorn
2 tablespoons Oil
2 tablespoons Honey
30g Unsalted Butter
Sea Salt to taste

Method:

1. Pre-heat the oven to 160°C.

2. In a large pot, add oil and popcorn and stir to mix.

3. Cover the pot and heat over medium heat to pop the popcorn. Once you hear the popcorn start popping, take the pot off the fire occasionally and shake to mix and ensure that the popcorn does not burn.

4. When the popcorn has stopped popping, take the pot off the heat and pour the popped popcorn into a baking tray and spread out the pieces evenly.

5. In a separate bowl, melt the butter and mix in the honey. Add salt to taste. (I stick the butter in the microwave for 20-30 seconds to melt it if it's fresh out of the fridge and too hard.)

6. Pour the honey and butter mixture over the popcorn in the baking tray and mix to ensure that the popcorn is evenly coated.

7. Put the tray of popcorn in the oven to bake for about 15 minutes for the coating to dray and harden. Serve warm and tuck in!

Cooking Notes: 

♥ My kids often cannot wait the extra 15 minutes for the popcorn to bake in the oven, so I usually serve it to them straight after coating the popcorn. The downside to that is that their fingers get all sticky and oily eating the popcorn, but taste-wise, I think it's just as delicious.

Snack away!

Popcorn1 

I made a batch earlier today and together with the kids, sat down to watch The Sound of Music. It certainly made for a wonderful afternoon.


Friday, August 16, 2013

Chicken in Milk (with Greenfields)

I don't know about your kids, but my two have never been huge fans of milk. I don't think it was so much the milk per se, but more the fact that they are just not big drinkers. Even now, Meips only drinks barely 160ml per day, three times a day. And that's on good days.

While milk is not their primary source of nutrition now as a toddler and pre-schooler, I still like to incorporate some milk and dairy into their meals to ensure that they are getting enough calcium in their diet. So apart from a cup in the morning, I like to give them cheese and yogurt, and use some milk into my dishes.

One recipe which I have been intrigued by for a while now is a Jamie Oliver recipe (yes, another one!) for Chicken in Milk, so when I was recently given a variety of milk by Greenfields Milk for a review, I thought it would be the perfect dish to show what you can do with milk in a savoury dish. The recipe does sound a bit odd when you first look at it -- lemon and milk are an odd combination since lemon is known to split milk and make it curdle. That's not exactly the the most appetising of images! And with cinnamon too? But trust me when I say that this recipe is quite a winner. The sauce was yummy and we all happily tucked into the chicken, with the curds and all. Just don't add too much of the rind when zesting the lemons or you might end up with a bitter taste to your sauce like I did the first time round.

I made this chicken with some modifications that I read online, which included cooking the chicken covered for the first hour, and I think it helped make for a more tender chicken than if I had cooked it uncovered the entire time. Do try this if you’re looking for a good one-pot meal to add to the dinner roster.

Greenfields4

Chicken in Milk (adapted from this recipe by Jamie Oliver, taken from Happy Days with the Naked Chef.)
(Serves 4-6)


Ingredients:
1.6 kg chicken
Salt & Pepper
125g butter (I use the unsalted variety)
½ stick of cinnamon
1 handful of sage leaves
Zest of 2 lemons
10 cloves garlic, skin on
565ml fresh milk

Method:
1. Preheat the oven to 190°C.

2. Pat your chicken dry (if wet/defrosted) and season the whole chicken generously with salt and pepper.

3. Melt the butter in a pot (of a size that would fit the chicken snugly) and fry the chicken in the butter, turning the chicken to get an even golden colour all over.

Greenfields2

4. Remove the pot from the heat, put the chicken on a plate, and throw away the butter left in the pot.

5. Put your chicken back into the pot and add the cinnamon, sage leaves, lemon zest, garlic and milk.

Greenfields3

6. Cover the pot and place this in the pre-heated oven for 1 hour. Baste with the cooking juices when you remember. (I do it every 20 minutes or so.)

7. After 1 hour, remove the cover and cook uncovered for a further ½ hour till it's ready to serve.

Cooking Notes:

♥ Remember not to include too much of the rind in your lemon zest as it might make the sauce bitter. I sometimes squeeze some lemon juice into the milky mixture before sticking it into the oven, which I feel gives it more tang. 


Greenfields5

To serve, pull the meat off the bones and divide it onto your plates. Spoon over plenty of juice and the little curds. Suggested sides include wilted spinach or greens and some mashed potato. My kids like to have this with plain penne pasta.

And an additional point on the milk: I was recently introduced to Greenfields milk and was impressed with the fact that it has no additives, chemicals, antibiotics and hormones. The milk comes from the brand's own integrated dairy farm with over 6000 Holstein cows in East Java, and this means that the milk is produced, pasteurised and packed all on site, minimising the risk of contamination. It's natural, good-tasting fresh milk, and one that I would drink -- and have been drinking -- every morning, in addition to using in my cooking. They call it "honest milk" and I think that's telling it like it is.

Greenfields1

* Greenfields Milk is available in variants of Fresh Milk, Chocolate Malt, High Calcium Skimmed Milk (less than 0.1% fat) and High Calcium Low Fat (only 1.3% fat). Available at most supermarkets at $5.95 for a 2-litre bottle (except at FairPrice), $3.25 for a 1-litre pack and, exclusively at 7-11, $1.50 for a 200ml pack. Buy any 2 x 2-litre bottles or 3 x 1-litre packs to get your free limited edition cup. Promotion valid from 12 August, while stocks last and available at major supermarkets and hypermarkets nationwide. Limited to four cups in a single receipt.

* This post was sponsored by Greenfields Milk.

Wednesday, July 31, 2013

Dinner-By-Blender: Tomato Soup

Random fact about me: I really love soup. In fact, I love my soup so much that my half-Cantonese husband thinks that I am more Cantonese than him in that respect!  

While Chinese soups definitely rank among my favourites, I also have a soft spot for Tomato Soup. So when the husband piped up requested some soup over the weekend a couple of weeks back, I took it as my opportunity to whip up my own tomato soup to accompany our meal.

(The husband, who really just wanted me to open a can of Campbell's, rolled his eyes.)

On this occasion, I decided to try Jamie Oliver's basic Tomato Soup recipe, which I've been meaning to try. Seemed appropriate too, since I was going to be putting my Jamie Oliver Blender to the test. I have a hand blender which I regularly use when making pureed soups, but with a regular - and more powerful - blender now, I was curious to see how it would compare. 

Tomato1

The steps weren't complicated, but surprise surprise, Tomato Soup isn't just made from tomatoes. Indeed, a good number of other vegetables like carrots, celery, onions and garlic help to give the soup the body to round it out. Sweet tomatoes really do make a difference though. I used the Momotaro tomatoes from the supermarket in addition to tinned Roma tomatoes. 

And the final verdict? The husband grudgingly told me that the soup was "quite nice". Meips found it a bit too sour for her tastebuds -- she doesn't take to sour tastes AT ALL -- but Noey loved it and happily dipped his toast in finished up most of his portion. I found it quite tangy and full of tomato flavour, which I love. I also liked the fact that I got a really smooth soup with the blender. Previously when using a hand blender, try as I might, there was always a piece of two of something that escaped blending that I'd end biting into. This time, there were no such lumps. That said, it was more inconvenient ladling hot soup into the blender as compared to sticking a hand blender into the pot. That's the trade-off I guess! 

The blender also didn't completely do away with some celery fibres and the tomato seeds, so the next time I do this, I'm probably going to strain the soup after blending to get rid of these bits.

I had some leftovers for lunch the next day, and I decided to add a dollop of cream to my bowl, and I really liked it. I felt the cream rounded off the sharpness of the tomato in a good way. Try it - you might like it.


Tomato Soup (adapted from the recipe by Jamie Oliver)
(Serves 6-8)

Ingredients:

2 carrots, roughly chopped
2 sticks of celery, roughly chopped
2 medium onions, roughly chopped
2 cloves of garlic, peeled and sliced
2 tablespoons olive oil
1.5 litres of chicken or vegetable stock
400g tinned plum tomatoes
3 large ripe tomatoes
1 small bunch of fresh basil
Salt and Pepper, to taste.

 Method:

1. Put a large pot on medium heat and add the olive oil. Then add the carrots, celery, onions and garlic and mix together with a wooden spoon.

Tomato2

2. Continue to cook the vegetables in the pot for around 10-15 minutes, until the carrots have softened but are still holding their shape, and the onion is lightly golden.

3. Add the stock into the pot, together with your tinned and fresh whole tomatoes. (Jamie recommends including the green stalks that may still be attached the tomatoes for added flavour.) Stir and bring this to a boil.

4. Reduce the heat and simmer for 10 minutes with the lid on.

5. When the soup is ready to be served, remove the pot from the heat, season with salt and pepper and add the basil leaves.

6. Ladle soup into blender and pulse the soup until smooth. You can also use a hand blender for the same function. 

Tomato3

7. Taste and season again before dividing between your serving bowls.

Tomato4

Cooking Notes:

♥ After blending the soup, you might wish to pour the soup from the blender through a strainer to remove seeds and fibres. 

♥ Adding a dollop of cream to the soup right at the end makes for a creamier soup.

Enjoy the tomato-y goodness!

Click here to check out other posts in my Dinner-By-Blender series.
 

Thursday, June 27, 2013

Dinner-By-Blender: Orange Cake

You might have noticed my new blender in my previous post.

I was recently given the opportunity to test out the new Philips Jamie Oliver Blender, one of the new products in the Philips range. 

I must admit that the machine I really wanted to try was the Philips Jamie Oliver Food Processor. Who wouldn't want a machine that does purports to do everything, right? I think a blender immediately brings to mind smoothies, maybe soups, and… not much else. 

But as I started to flip through my recipe books and look up recipes online to think of how to do something different with my blender, I found myself getting excited about the possibilities. And I decided to set myself a challenge: to make a 3-course meal with my blender, and throw in a drink too, for good measure.

I decided to start with dessert, mainly because I had all the ingredients available and I was most excited about this recipe which I had come across. Plus, who doesn't love dessert?

Can you guess what we are going to make?

Hint: It's not a smoothie, ice-cream or mousse.

JO1


It is… AN ORANGE CAKE.

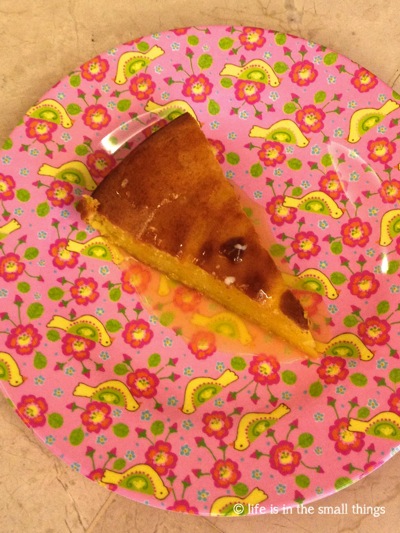
Yes, cake from a blender! How about that huh! And the main ingredient is an orange -- skin, pips and all.

The recipe was simple enough that I was able to let the kids help out. 

Orange Blender Cake

Ingredients:

1 large orange
1½ cups self-raising flour
1 cup sugar
3 eggs
180g melted butter
Some icing sugar (for dusting once baked)

Method:

1. Preheat the oven to 180°C. Grease a round or rectangle cake tin.

2. Cut your orange, skin and all, into small pieces. Place in the blender and whiz together till mushy.

JO3

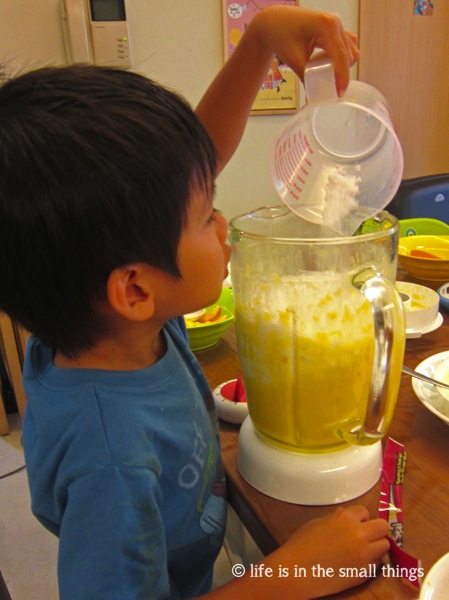
3. Add all of the other ingredients (except the icing sugar) and blend until just combined. 

JO2

4. Pour the mixture into your prepared tin and bake for 40-45 minutes, or until a skewer inserted into the cake comes out clean.

JO4

5. Dust with icing sugar and serve as is, still warm, or with a spoonful of cream, ice cream or natural yoghurt. I made a simple orange icing with mine (icing sugar + orange juice) and it was delicious.

JO5

Cooking Notes:

♥ Remember not to over mix the ingredients after adding the flour in step 3. Just whizz till they are incorporated. You might wish to mix all the ingredients except the flour in the blender, then pour the mixture out into a bowl and mix in the flour separately. I found that the result was a lighter cake.

There you have it -- a simple, and easy cake from the blender! Possibly the easiest cake I've ever made.

And a quick plug for my blender too:

I'm really liking its sturdy construction and easy, no-frills operation. It's got a 2-litre chamber that can really hold a lot. I also like the fact that it's glass, which I feel is better because it would be more appropriate for hot liquids, and it wouldn't stain the way plastic does. There are 2 speeds and a pulse setting which I look forward to really putting to the test in my other recipes. It certainly made light work of my orange!

Stay tuned for the rest of my meal!

Click here to check out other posts in my Dinner-By-Blender series.

*Keep life simple with the PHILIPS | Jamie Oliver range which includes a food processor (S$268), blender (S$128) and handblender (S$108). Available at leading electronics and departmental stores.

*I was provided with the Philips Jamie Oliver Blender for review purposes and all opinions expressed herein are strictly my own.

Monday, June 24, 2013

We Love Zoku-ing Hot Days Away!

Hot muggy days are popsicle days!

Zoku1

I bought a Zoku Quick Pop-Maker from mommygrabs.com during a flash sale about 2 months ago, and since then we've been enjoying lots of ice lollies on hot days. Another mummy friend told me that ice lollies have been a great way to get kids to take in more fluids during these hot and hazy days, and I must agree! These go down in no time! 

The best thing about the Zoku is that the pops are made in minutes. You do have to freeze the pop-maker overnight first, but I just leave mine in the freezer so that we have it ready when we want it. To make a lolly, you just stick the sticks in the slots, pour in your desired liquid, and wait 7-10 mins. I sometimes just pop the maker back into the freezer while waiting so that it'll be even faster. You know, there's nothing like almost instant lollies when you have impatient kids on your back!

And when the lollies are done, you just have to use a Super Tool (yes, they actually call it that) to ease them out of the their molds easily. I don't know how it works, but there really is no tugging required. Just screw on the Super Tool (ahem) to the top of the stick, and after some twisting, it would suddenly get loose and you can pull the ice lolly right out. Awesome. 

I also like that because it freezes so quickly, you are able to make layers, or even a lolly with one flavour as a shell and another on the inside. Just like those orange ice lollies with milk inside that I used to love as a child. (Their name escapes me!) I've not tried this but it is on the cards.

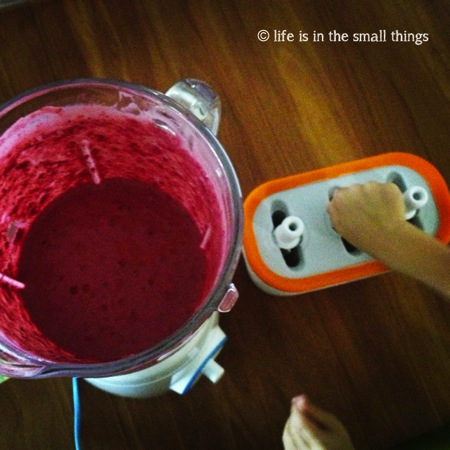
I recently wanted a thick, creamier popsicle, so out came my new Jamie Oliver blender and together they made a real winner.

Zoku2

I've had friends ask me about the recipe, but I honestly just threw in what I had in the fridge, and in my usual fashion, I didn't take note of the measurements. But if you're interested to try this, it comprises frozen strawberries and blackberries, milk, a bit of plain yoghurt and some Frosty Whip, which is a sweetened whipping cream powder. It was really yummy. So yummy that my terrible children climbed on the table to steal some from the blender jug when I walked to the kitchen to pop the Zoku back into the freezer.

Zoku3

And when the pops were done, Noey practically inhaled his, while Meips, well, let's just say she had fun with it.

Zoku4

Definitely a worthwhile investment! I've bought a couple more from Takashimaya as presents for friends, but I'm pretty sure you can get the Zoku at most major department stores. It definitely makes hot days more bearable!


LinkWithin

Related Posts Plugin for WordPress, Blogger...